Part 2 extends joined palms forward, opens the arms sideways, then brings the hands behind the back with a forward stance. Lift, press down, open, and return the hands to the front. Complete the left-side sequence before changing sides.
The route: palms together in front, behind, then in front
Hands and Feet Forward and Back (Shou Zu Qian Hou Gu Shen Yao) follows Part 1. Join the palms at the chest and step the left foot forward. The front leg stays straight during the forward hand extension; bending the knee and leaning forward come later, with the hands behind the back.
Left and right refer to your own sides, which appear reversed in a front-facing demonstration.
Steps 1–5: extend forward, then open sideways
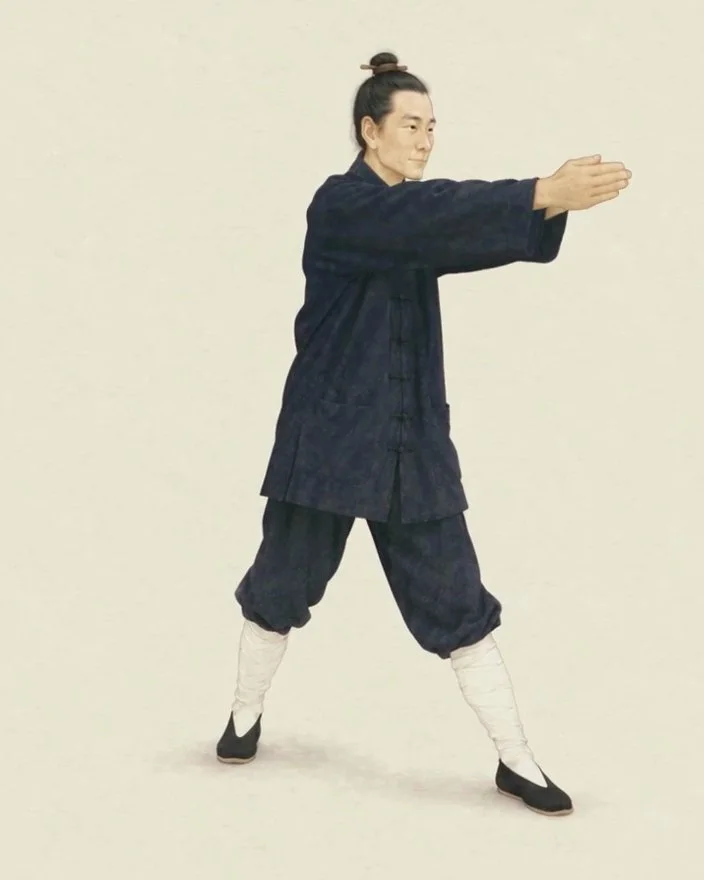
Oblique front view: left foot forward, legs not yet in the step 6 bow stance; palms together and arms extended forward at shoulder height.
- Join palms at the chest: leave a hollow between the centres of the palms.
- Step the left foot forward: move it diagonally forward and left, keeping the leg straight and body upright.
- Extend joined palms: reach forward until the arms are straight at shoulder height, looking ahead.
- Turn the palms: bring the backs of the hands together.
- Open the arms: separate the hands sideways, palms backward, until the arms form a straight line; pause briefly.
Palms together and backs of hands together are different shapes. Join the palms, extend, then turn before opening sideways.
Steps 6–9: join behind, lift, separate, press down
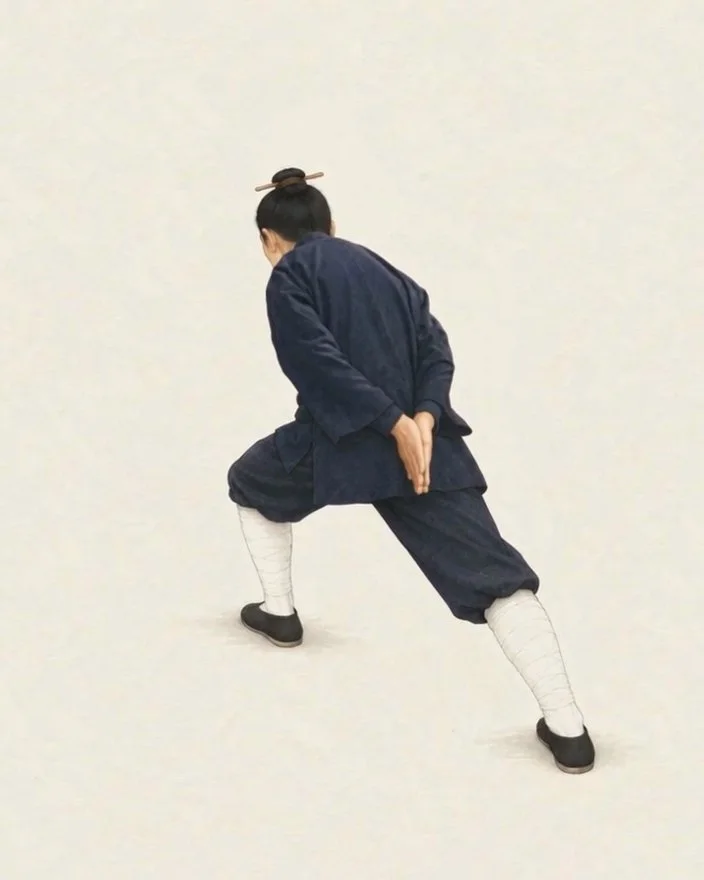
Oblique rear view: left knee bent and palms joined behind the back, before lifting or separating the hands.
- Join behind in the forward stance: bend the left knee and lean the body forward while bringing the straight arms back until the hands join near the tailbone; pause briefly. The manual cautions against bending at the waist and dropping the head.
- Lift joined palms: keep the palms together behind the back and lift toward the waist.
- Separate: open the hands and turn the palms toward the body.
- Press down beside the spine: slowly move the palms downward along either side of the back until the arms straighten.
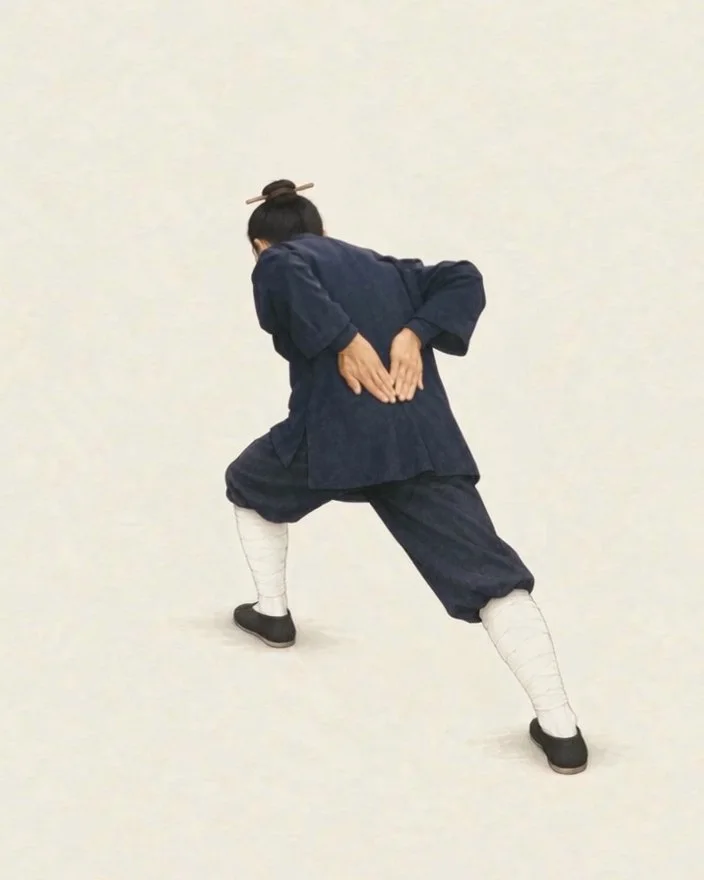
Oblique rear view: palms separated and facing the body; the downward press to straight arms follows in step 9.
Step 7 lifts joined palms; step 9 lowers separated palms. A rear view helps reveal this route. Matching the demonstrator’s hand height is not a universal measure of correctness.
Steps 10–13: open, join in front, return, change sides
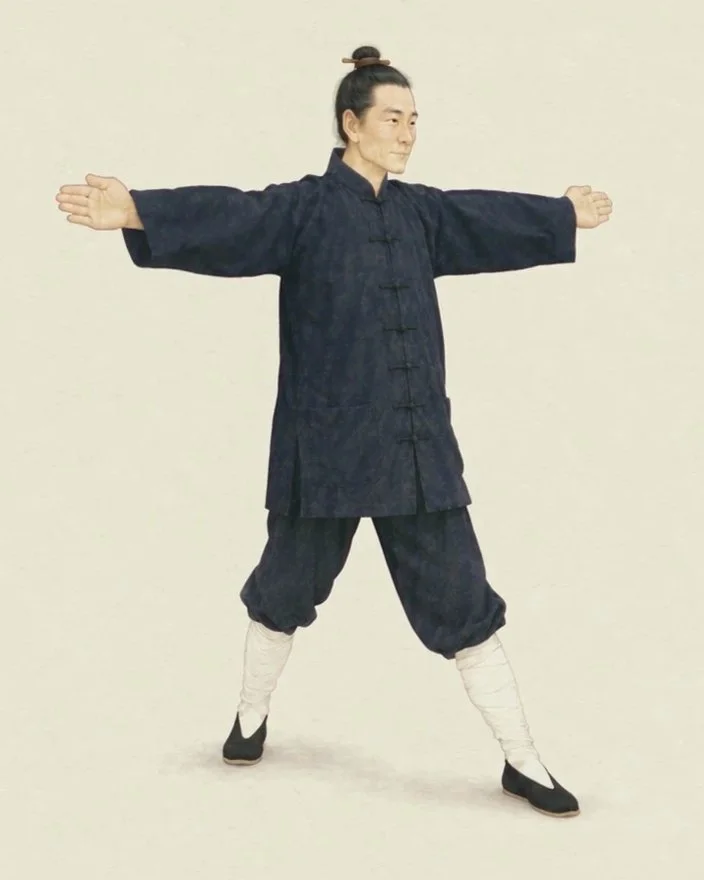
Oblique front view: palms face forward, arms open at shoulder height, and front leg is straight; the palms have not yet joined in front.
- Raise diagonally outward: lift the hands sideways and upward, gradually turning the palms forward, until shoulder height. Straighten the front leg at the same time.
- Join palms in front: bring the straight arms forward together, still at shoulder height; pause briefly.
- Draw hands and foot back: return the palms to the chest and draw the left foot back.
- Change to the right: settle with feet shoulder-width apart, step the right foot diagonally forward and right, and repeat in the opposite direction.
Do both sides count as one, and does the foot return?
The manual counts left and right together as one repetition. After the left sequence, bring the palms to the chest and draw the left foot back before stepping out with the right. One direction alone does not complete both sides.
Remember the hand route behind the back
Use four landmarks: join → lift → separate → press down. The palms remain joined while lifting and separate before pressing down. An image showing separated hands belongs to the later phase, not the start of the lift.
Before the next part, identify the change from joined palms at the chest to fists in front of the abdomen. Continue to Part 3, raising and pressing.
References and sources
- Babu Jingang Gong, Part 2: printed pages 23–37
Reference for Part 2 step numbers and wording. In this scan the PDF page count is 13 higher than the printed number; check the contents when using another scan.
- Illustrated Babu Jingang Gong, pages 7–10
Used to compare positions, routes, and grouping. Website diagrams were made separately; the guide’s photographs are not reproduced.