
Part 1 extends the arms down, raises them sideways, turns the palms upright, moves above the head, brings the backs of the hands together, and reaches upward. The arms then lower sideways, the hands drop at the wrists, and return to the abdomen.
Start with feet apart and hands at the abdomen
Upward Reach (Shuang Shou Cha Ding Li San Jiao) continues from preparation: feet shoulder-width apart, hands in front of the abdomen. First lower the hands, then lift the arms sideways. The manual’s numbers 1-1 to 1-9 describe nine changes within Part 1, not nine walking steps.
Left and right refer to the practitioner. They appear reversed when watching a front-facing demonstration.
Steps 1–3: down, sideways, upright palms
- Extend the arms down: lower the hands from the abdomen, fingers together, extending the arms down and slightly to the sides.
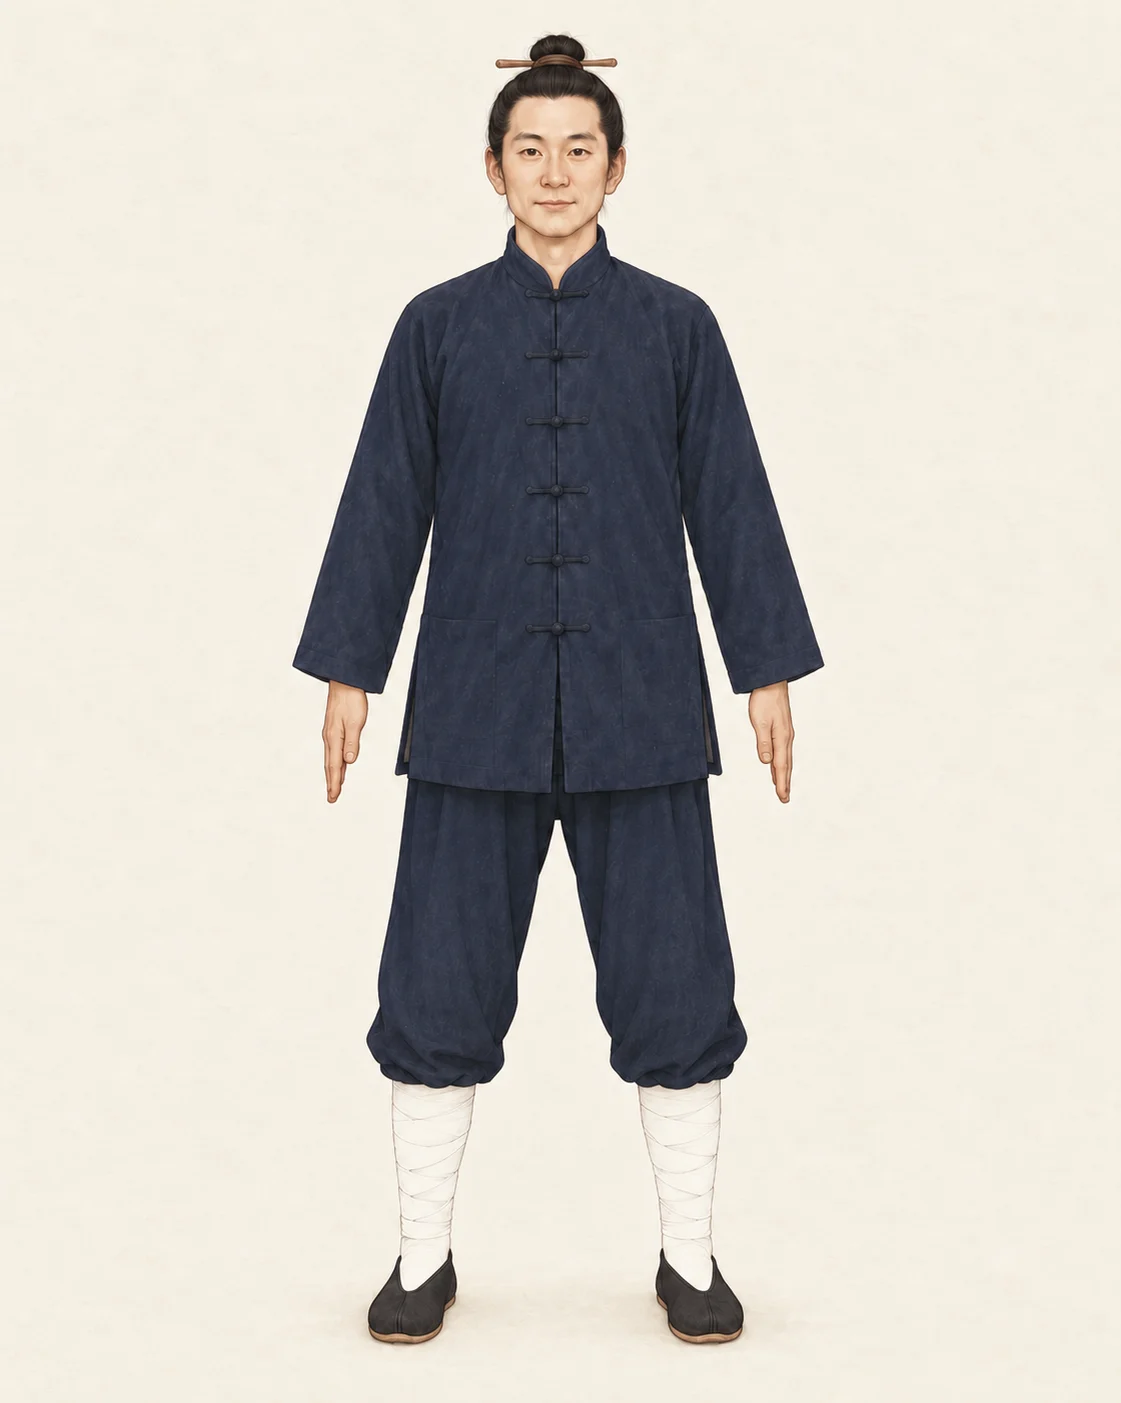
Teaching diagram · Part 1, step 1 · Arms extend down
Front view: feet shoulder-width apart, fingers together, arms extended down beside the body. - Raise the arms sideways: gradually lift the straight arms to shoulder height, palms down, and pause briefly.
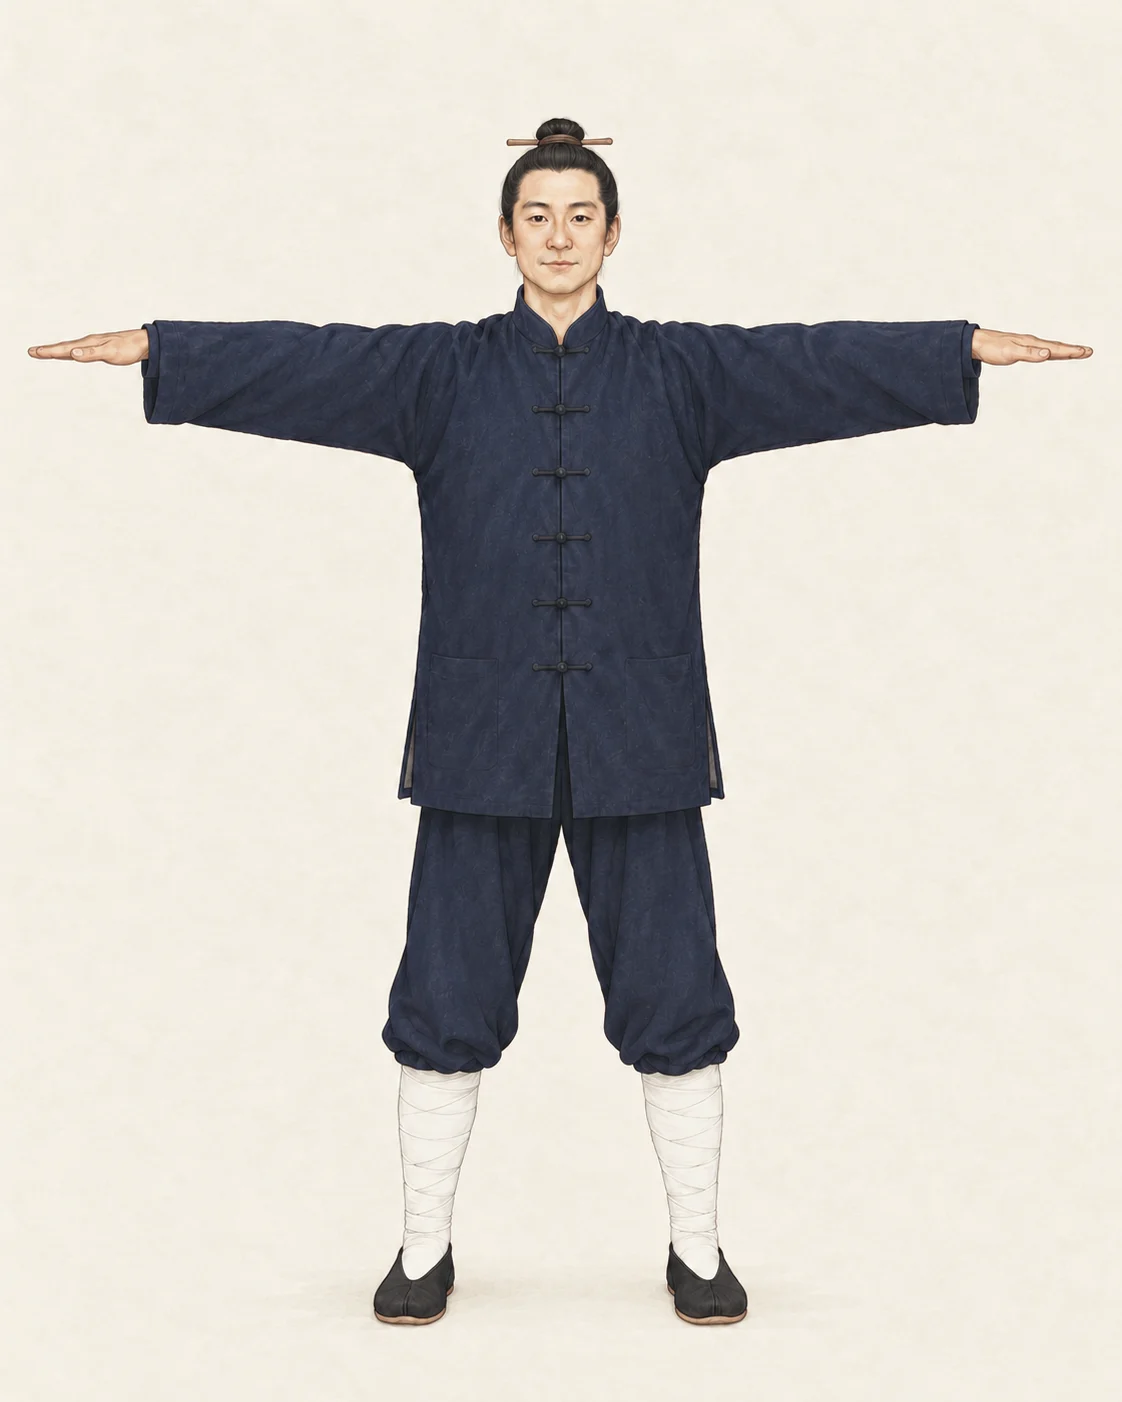
Teaching diagram · Part 1, step 2 · Arms rise sideways
Front view: feet unchanged, arms at shoulder height with palms facing down. - Turn the palms upright: keep the arms sideways at shoulder height and hinge at the wrists so the fingertips point up and palms face outward.
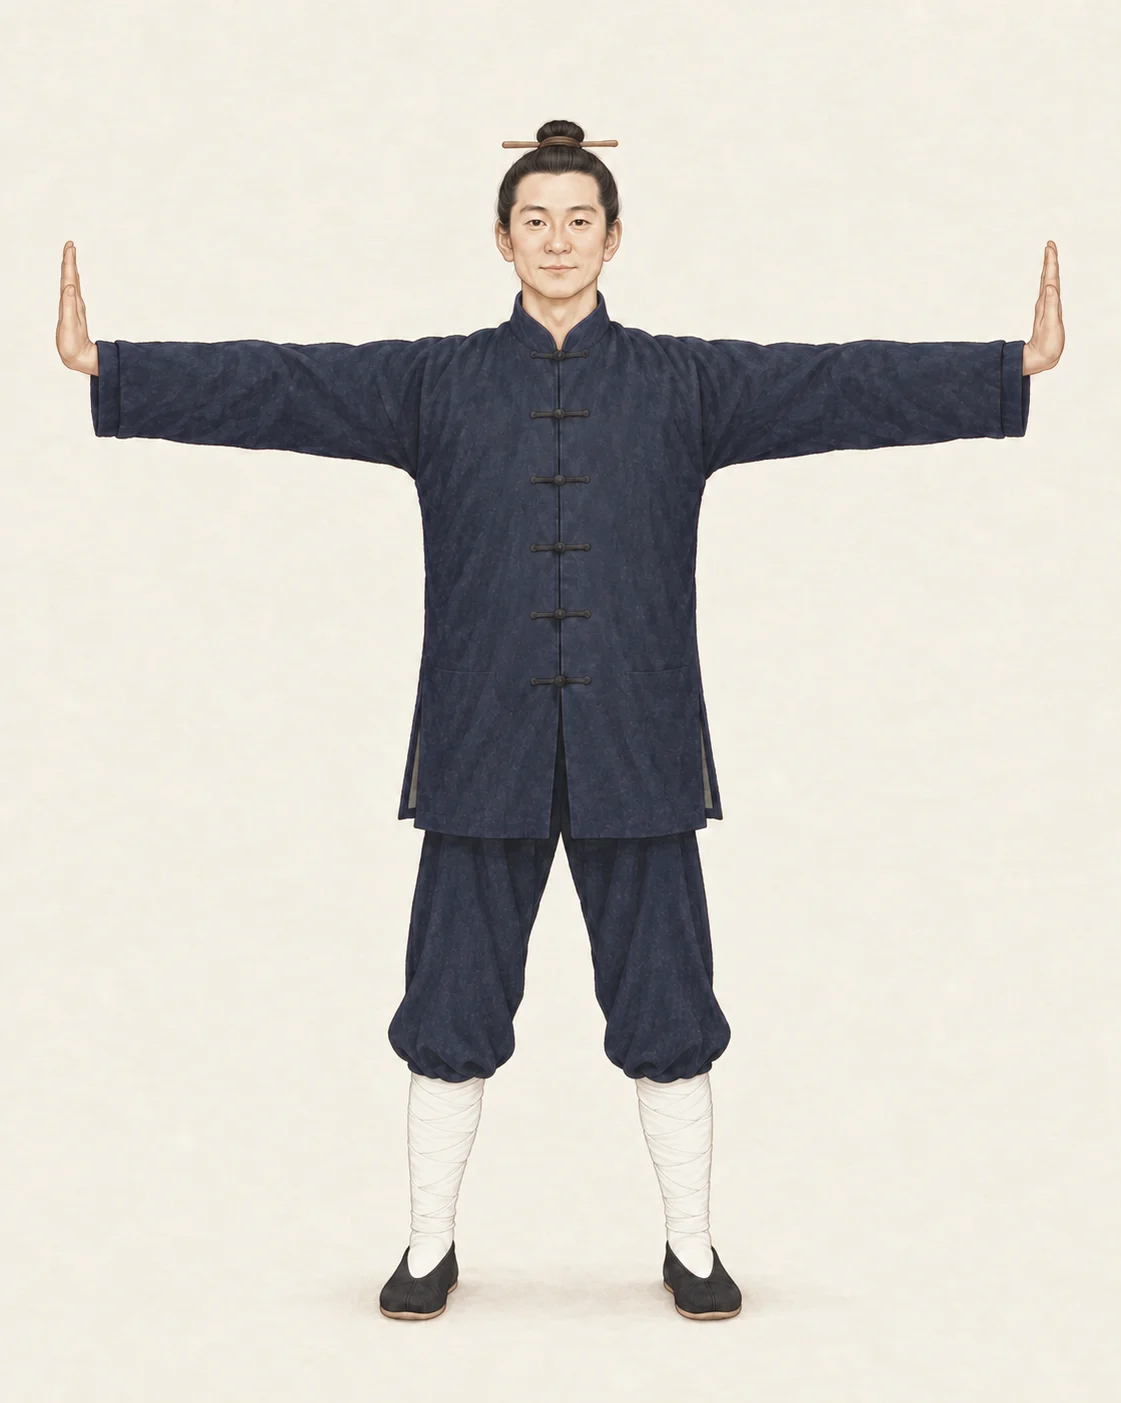
Teaching diagram · Part 1, step 3 · Palms turn upright
Front view: arms remain at shoulder height, fingertips point up, and palms face outward.
Separate raising the arms from turning the palms. Step 2 changes arm height; step 3 mainly changes hand direction. Do not merge them into an indistinct upward movement.
Steps 4–6: above the head, backs together, upward reach
- Bring the hands above the head: bend the elbows and turn the palms up. Bring the middle fingertips together above the head. The manual places the brief pause about two finger-widths above the head.
- Bring the backs of the hands together: turn the hands so their backs meet and the fingertips point upward. This differs from palms together in front of the chest.
- Reach upward: continue straightening the arms upward, then pause briefly.
The manual describes a forceful upward action at step 6. This text identifies its route without turning that description into one speed or intensity everyone must use. Retain the hand changes in steps 4 and 5 instead of copying only the final position.
Steps 7–9: lower, drop the hands, return
- Separate and lower: open the hands apart and gradually lower the arms sideways to shoulder height, palms down; pause briefly.
- Let the hands drop: hinge at the wrists so the hands point down and the palms face inward.
- Return to the abdomen: sweep the arms down and inward in an embracing motion, with the hands separate, returning near the navel; pause briefly. Keep the same foot spacing.
This completes one Part 1 sequence at the abdomen. It does not complete the separate closing of the whole routine.
Five pauses and the traditional mental cues
At steps 2, 4, 6, 7, and 9, the manual associates the pauses with the cues Sheng, Zhang, Hua, Shou, and Cang—roughly arising, growing, transforming, gathering, and storing. These identify the source’s traditional arrangement.
They are not an inhale, hold, and exhale rhythm. The preparation guide separately specifies normal breathing. Do not assign a breath hold to each cue. See breathing, effort, and pauses.
The arms reach shoulder height twice: what changes?
Steps 2 and 7 both have arms at shoulder height and palms down, but the next movement differs. After step 2, turn the fingertips upward into the upright-palm position on the way toward the head. After step 7, drop the hands at the wrists on the return to the abdomen. Identify whether you are moving into the upward sequence or returning from it.
Review the nine steps as three groups
- Open: extend down → raise sideways → upright palms.
- Reach: palms up above the head → backs of hands together → reach upward.
- Return: lower sideways to shoulder height → hands drop at the wrists → return to the abdomen.
These groups help locate a step; they do not change the manual’s nine-step sequence. Check an unclear step together with its neighbours and the matching continuous demonstration.
References and sources
- Mi Jing Zi: Babu Jingang Gong, numbered steps and instructions
Editorial reference scan of Babu Jingang Gong (Chinese title transliterated), credited to Mi Jing Zi: 147 scanned pages, without a text layer. Introduction: printed pages 4–5; preparation: 6–9; Part 1: 13–21. PDF page numbers are 13 higher in these ranges. No public original, publisher, year, edition, or ISBN has been verified for this copy. This link identifies the copy and its pages; it is not an original-file download or clinical evidence.
- Illustrated Babu Jingang Gong: Zhang Zhishun demonstration, 33 pages
Editorial reference scan of Tujie Babu Jingang Gong (Chinese title transliterated), crediting Zhang Zhishun as demonstrator: 33 pages. Preparation: page 2; parts: pages 3–32; closing: page 33. No public original, editor, or publication details have been verified, including its status as an official companion to the manual. This link is a copy-identification note, not an original-file download.