Part 4 circles both arms before one palm pushes outward and the opposite fist draws back. Turn the palm, draw the fists in, then repeat the circles and the mirrored sequence on the other side.
Begin with the circles, not the final bow shape
Drawing the Bow (Zuo Gan You Fei Ru She Diao) begins with fists at the abdomen and a left step out. Open the hands and extend left, then circle up, right, and down before the pushing palm and drawing fist.
Directions refer to the practitioner’s own left and right.
Steps 1–6: step out and circle twice
- Prepare: continue from the previous part with fists at the abdomen and feet apart.
- Step left: move the left foot farther left.
- Extend the arms left: open the fists, palms facing each other, and extend parallel arms left at shoulder height.
- Circle upward: continue moving both arms up.
- Circle right: pass above and move toward the right side.
- Circle downward: lower on the right. Complete two circles along the same route and pause briefly below the abdomen.
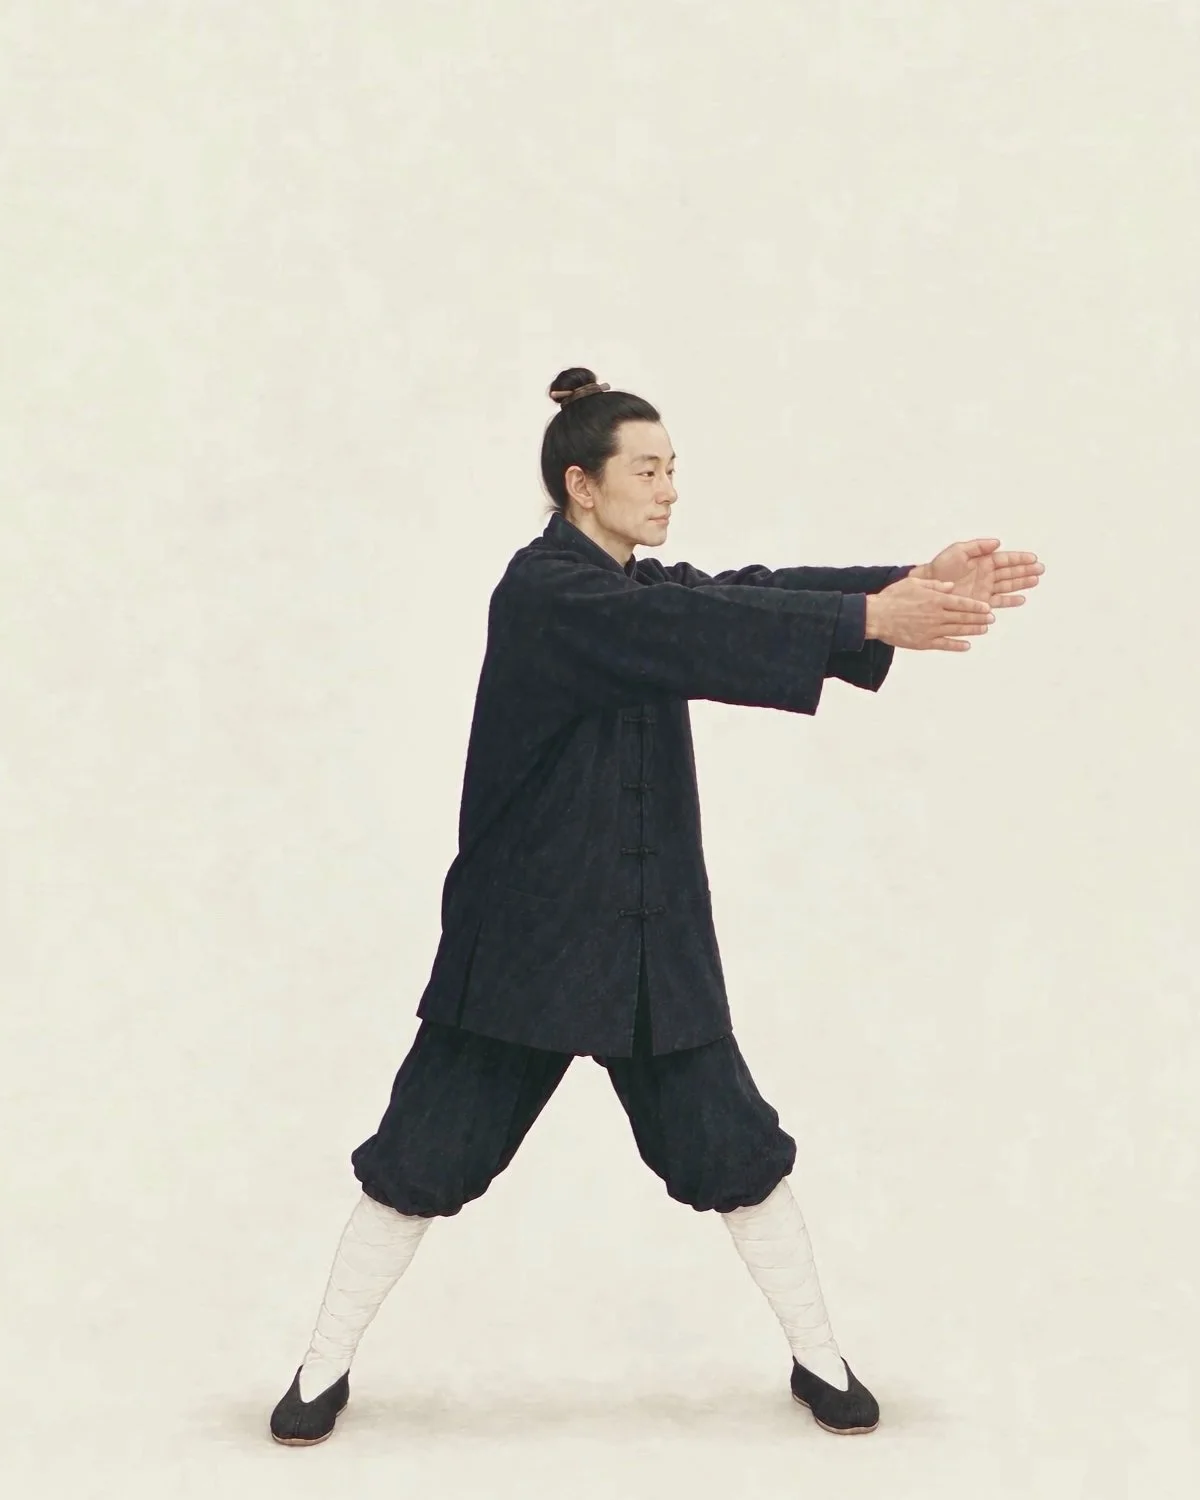
Oblique front view: arms reach toward the practitioner’s left, palms facing each other. This is one position on the route that continues up, right, and down.
Steps 3–6 divide a continuous circle into directional references. The diagram shows one position, not a command to stop at every direction.
Steps 7–10: lift fists, upright palm, arc past the knee
- Lift the fists: close both hands and lift the facing fists to the navel.
- Raise the right palm upright: open the right fist in front of the chest, palm left.
- Arc past the knee: move the right palm below the right chest, down and right near the right knee, then along an arc forward, right, and upward.
- Form the bent-knee stance: push the right hand to shoulder height as a sideways palm facing outward. Bend the left knee and place the body’s weight on the left leg.
The right palm pushes while the left leg bends and bears weight. Remember this relationship in your own body’s directions.
Steps 11–14: draw the fist, look, turn, return
- Draw the left fist horizontally: lift it near the right armpit, palm side inward, then draw it across to the left armpit like pulling a bowstring; pause briefly.
- Look toward the palm: the manual directs attention toward the centre of the right palm, with an image of aiming into the distance.
- Turn the right palm: rotate it into an upright palm facing forward.
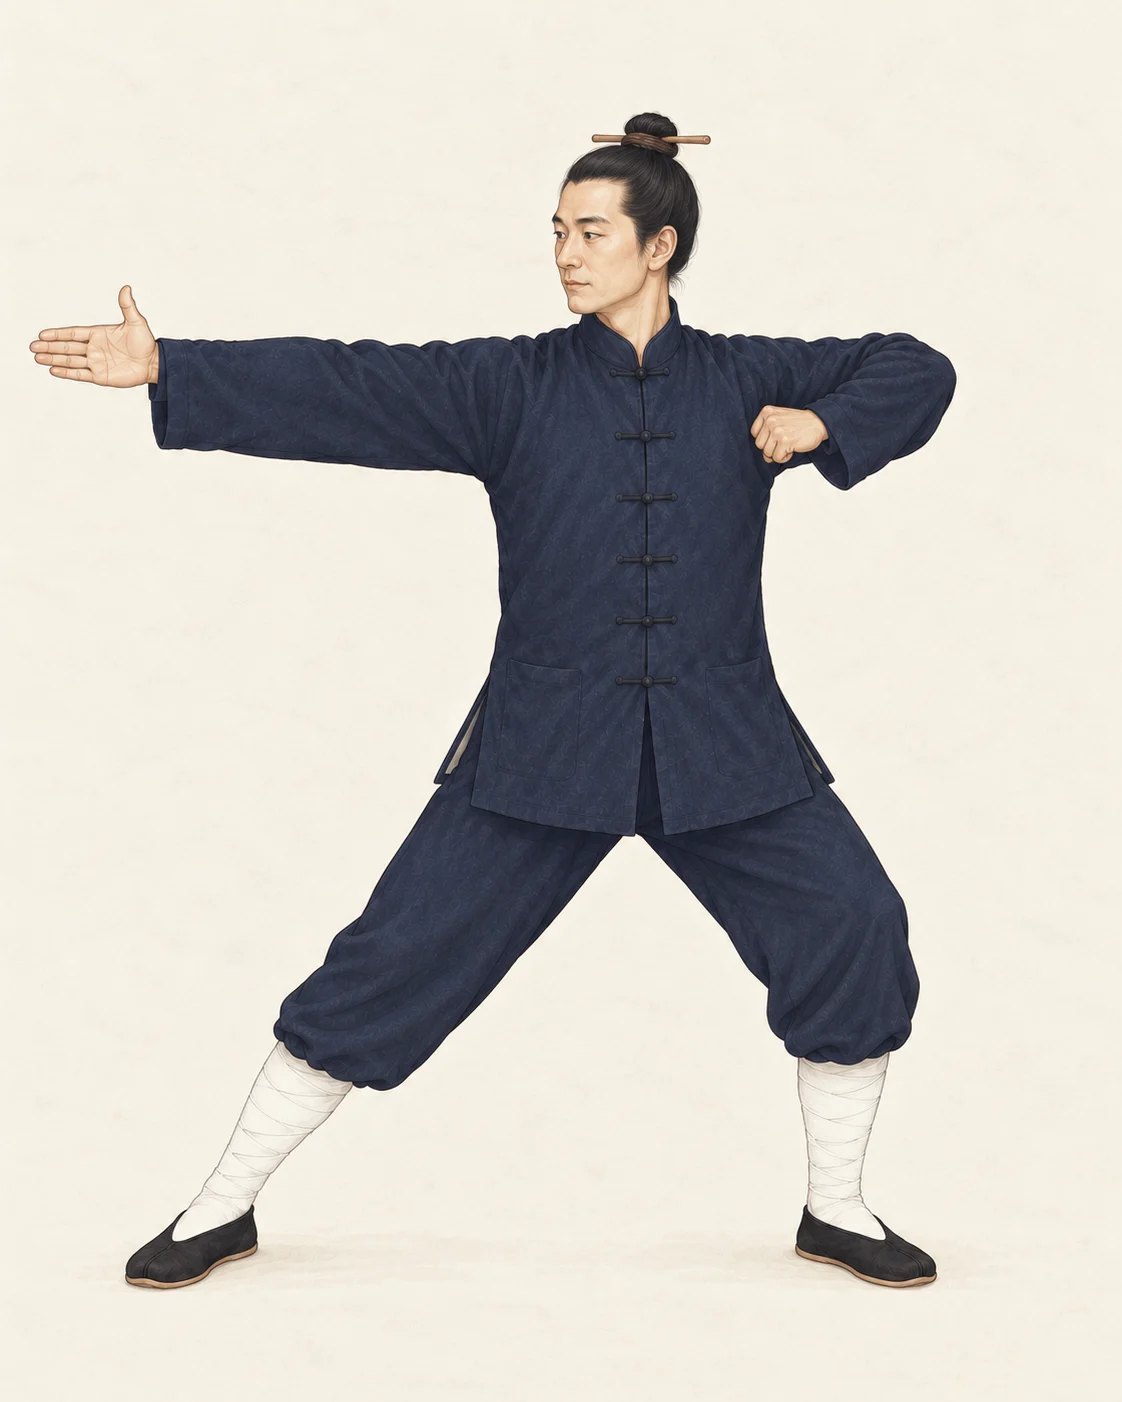
Teaching diagram · Part 4, step 13 · Right palm after turning
Front-oblique view: right arm extended with palm forward, left hand still a fist, and weight on the bent left leg. This shows step 13, not the sideways palm in step 10. - Draw both fists back: close the right hand and pull it toward the right ribs. Move the left fist there at the same time; fists face each other with palm sides inward.
Steps 15–16: opposite side and finish
- Change to the right-side sequence: open both hands and extend right. Circle up, left, and down twice, then lift the fists. The left palm now pushes and the right fist draws, with the right knee bending.
- Finish the part: circle the hands once, draw them into fists, and bring the left foot back.
Which hand do I look at, and when does it become a fist?
In the left-side sequence, the right hand is the pushing palm and the left is the drawing fist. Look toward the centre of the right palm. It remains a palm through looking and turning, then becomes a fist for the return at step 14.
Changing sides includes another pair of circles
Extend both palms right, circle up, left, and down, then push with the left palm, draw with the right fist, and bend the right knee. Review from the start of the circles rather than mirroring only the final bow shape.
The part ends with a circle, fists drawing in, and the left foot returning. Continue to Part 5, looking back toward the foot.
References and sources
- Babu Jingang Gong, Part 4: printed pages 50–65
Reference for Part 4 step numbers and wording. In this scan the PDF page count is 13 higher than the printed number; check the contents when using another scan.
- Illustrated Babu Jingang Gong, pages 14–18
Used to compare positions, routes, and grouping. Website diagrams were made separately; the guide’s photographs are not reproduced.